
In the previous installment of this series, we discussed how Information Security can be similar to insurance … it’s only discussed when bad things happen, and it’s rarely a revenue generating center. We also talked about how one might show return on investment in the Information Security Team. Finally we walked through a four phase Cyber Kill Chain that could be used to simplify a complex demonstration of Information Security that could be presented to non-InfoSec managers and Board of Directors. In this part of the series we will install Virtualization Software for the Virtual Penetration Lab that will be the foundation of our demonstration to the Board of Directors.
What is Virtualization Software?
Virtualization software runs on a host computer (the real or physical computer) and allows you to create and run Virtual computers and networks inside the host computer. Virtualization software installs on an Intel or AMD-based computer running Windows, Mac, Linux or Solaris operating systems. It extends the capabilities of your existing computer so that it can run multiple operating systems (inside multiple virtual machines) at the same time. So, for example, you can run Windows and Linux on your Mac, run Windows Server 2008 on your Linux server, run Linux on your Windows PC, and so on, all alongside your existing applications. You can install and run as many virtual machines as you like — limited by host computer free disk space, memory, and compute speed.
Host recommendations
Since disk space, memory, and compute speed limits how many Virtual Machines (VMs) you can run lets discuss reasonable recommendations to accomplish this demonstration. In my demonstration I had the following VMs running simultaneously:
| Virtual Machine | Operating System | Memory | Disk Space |
| Firewall VM | pfSense 2.2.6 | 512 Mb | 4 Gb |
| Utility VM | Ubuntu 14.0.4 | 4096 Mb | 20 Gb |
| Victim VM | Windows 7 SP1 | 2048 Mb | 20 Gb |
| Attacker VM | Kali Linux 2.0 | 2048 Mb | 20 Gb |
For my host computer I had the following specifications:
| Processor | AMD Phenom II CPU (Quad 3.4 GHz) |
| Memory | 16 Gb |
| Hard Drive | 1 Tb SATA |
| Operating System | Windows 7 Pro 64-bit |
At a minimum I would recommend a quad-core CPU, 16 Gb of memory, 128 Gb free Hard Drive space and a 64-bit Windows OS for your host computer.
Why Windows? While many could argue that a Linux host OS would be more efficient, I was going for simplicity. Remember, we are going to present to our Board of Directors live! For me Windows is fairly easy to run multiple displays, and we needed that feature to display three big screens.
How about 64-bit … won’t 32-bit be OK? There are some advantages to running in a 64-bit environment. One advantage is the ability to address larger amounts of memory. In a 32-bit host OS, the VMs are typically limited to 4 GB of memory, and while I have seen some online articles that suggest you can get a 32-bit kernel to address more than 4 GB of memory, processes running in the host OS are still limited to 4 GB (i.e. the VMs). This 4 GB limitation affects the VM’s virtual address space…which is a problem if applications running in the VM plan to make use of virtual memory via mmap(). While you may choose to use a 32-bit host OS, in my demo I chose a 64-bit OS and didn’t need to worry about memory.
Virtualization Software
There are several Windows compatible Virtualization Applications. The two more popular applications are VMWare Workstation and Oracle Virtual Box. Again, both have their pluses and minuses. But I was also looking for low cost … I was not given much of a budget to accomplish the presentation, so I opted for Oracle Virtual Box. While there are many features in Oracle Virtual Box, I will only cover what was needed to accomplish my demo. I followed these steps for my setup:
1. Download Install Executable
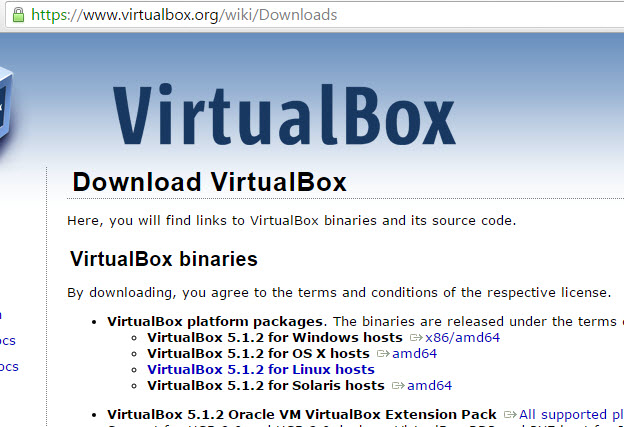
Go to www.virtualbox.org and download the latest version of the Windows Installer.
2. Check Executable Hash
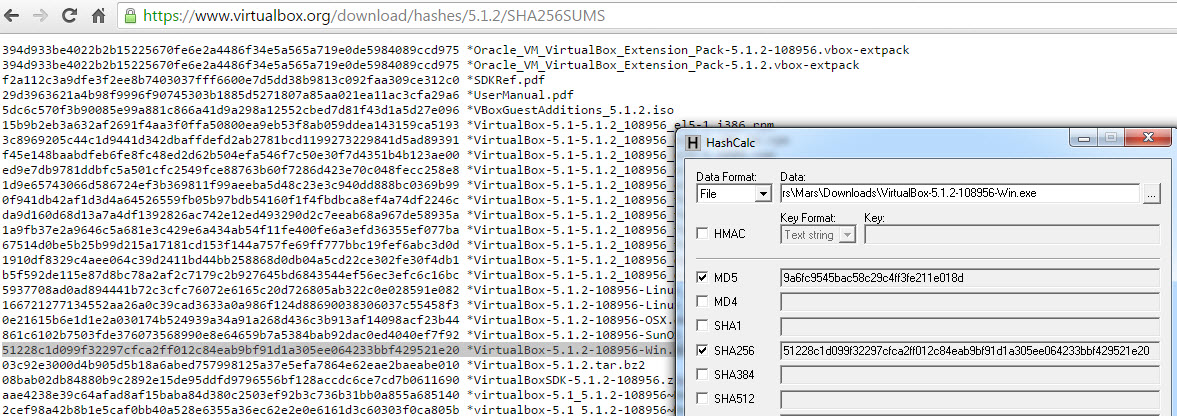
Once the file is downloaded make sure to check the hash of the file to validate its integrity.
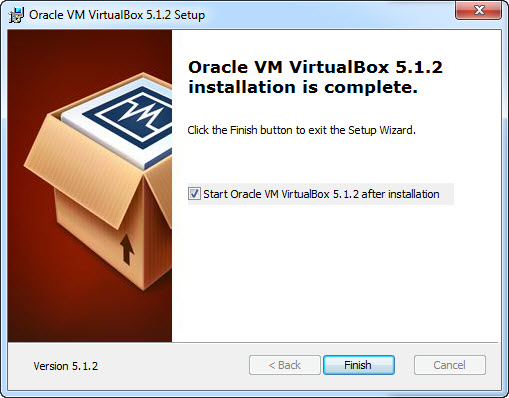
3. Install (with defaults)
Execute the installation executable. I used all the defaults and installed any recommended network drivers.
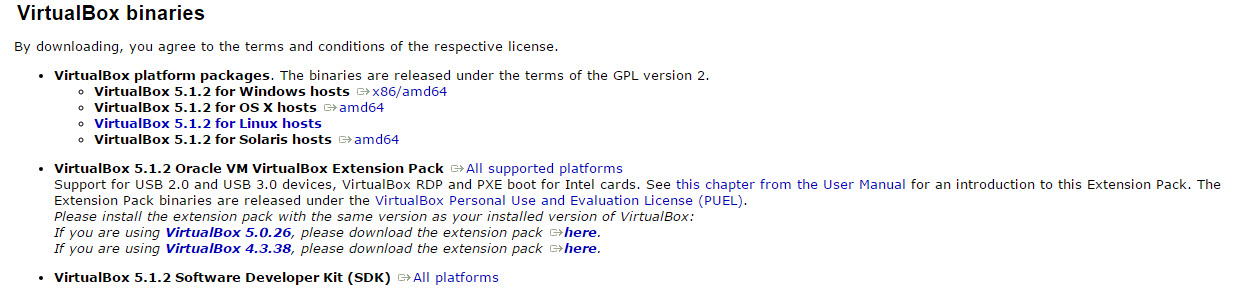
4. Download Extension Pack
In order to support USB 2.0 and USB 3.0 devices, Remote Desktop Connections and PXE boot for Intel cards on your VMs, you need to install the Extension Pack. Go to www.virtualbox.org and download the latest version of the Extension Pack.
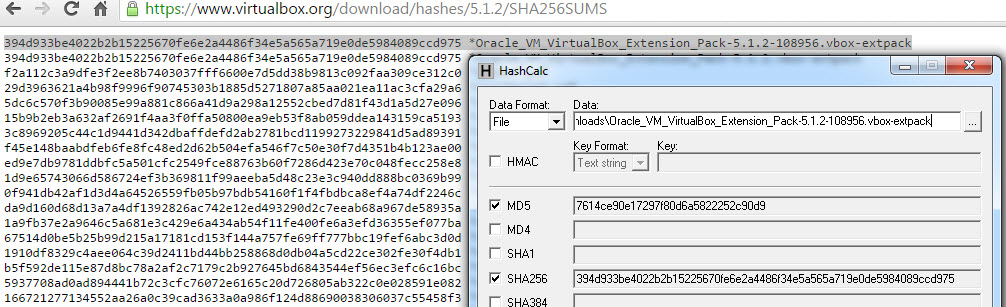
5. Check Extension Pack Hash
Once the Extension Pack file is downloaded, make sure to check the hash of the file to validate it’s integrity.
6. Install Extension Pack
Install the Extension Pack by:
1. Opening the VirtualBox Manager
2. Select File -> Preferences
3. Select Extensions from the settings options on the left
4. Click on the “Add new package” icon on the right (The blue square with an upside down triangle.)
5. Select the Extension Pack from your download location
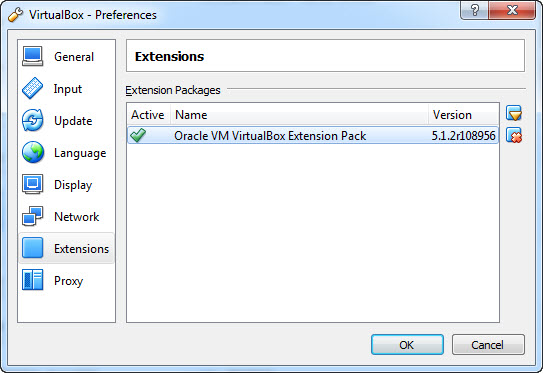
6. Accept any “I Agree” or “Are you Sure” pages and prompts
When all is done your Extensions panel should look like the image to the left.
Virtual Box Networks
Once I had the Virtualization Software installed, the next step was to design the network layout. If you recall from last week’s post, one of our objectives was to have a “network that was composed of the typical corporate protections (firewall, IDS, etc…).” To accomplish this objective we will need to use two of the Virtual Box network types: Host-Only Adapter and NAT Network.
Host-Only Adapter
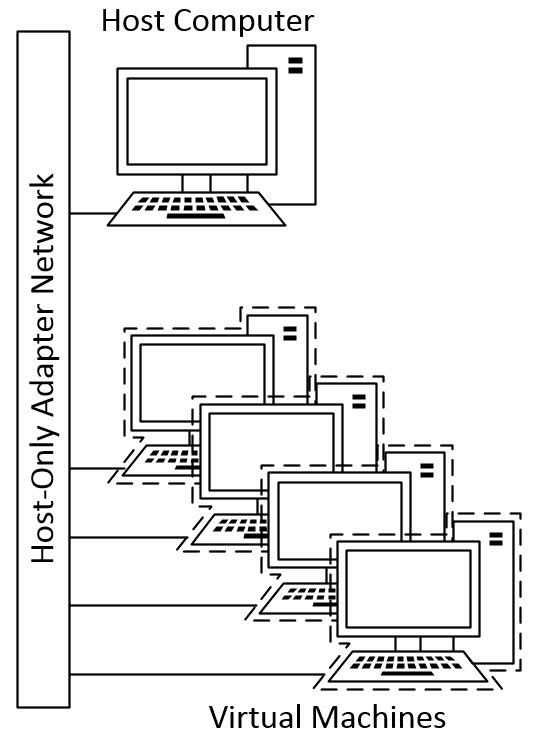
This networking mode can be used to create a network containing the host and any virtual machines attached to the network. A virtual network interface is created on the host, providing connectivity among virtual machines and the host. In our demo we will use a Host-Only Adapter to define the internal network of our Virtual Penetration Lab. A Host-Only Adapter network layout looks similar to this:
Virtual Box comes with a Host-Only Adapter defined, but we want to modify it to suit our needs. For my demo I wanted the internal network to have an IP address range of 10.10.10.x. So to change the settings on the Host-Only Adapter:
1. Open the VirtualBox Manager
2. Select File -> Preferences
3. Select Network from the settings options on the left
4. Select the Host-Only Networks tab
5. Highlight the default Host-Only Adapter
6. Click on the “screwdriver” symbol to the right of the network list
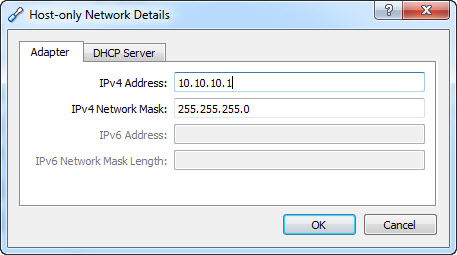
which will open the Host-Only Network Details panel
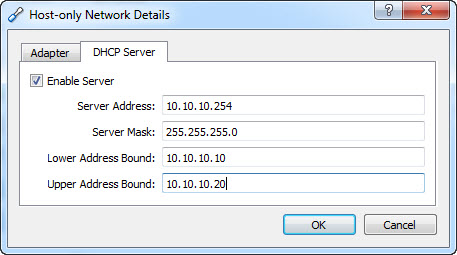
I wanted the host to have an IP address of 10.10.10.1 and I wanted to add a DHCP server to the network at address 10.10.10.254. The DHCP server would assign addresses in the range of 10.10.10.10-20. This is what the two tabs in the details panel looked like once configured. Click OK when you are done.
NAT Network
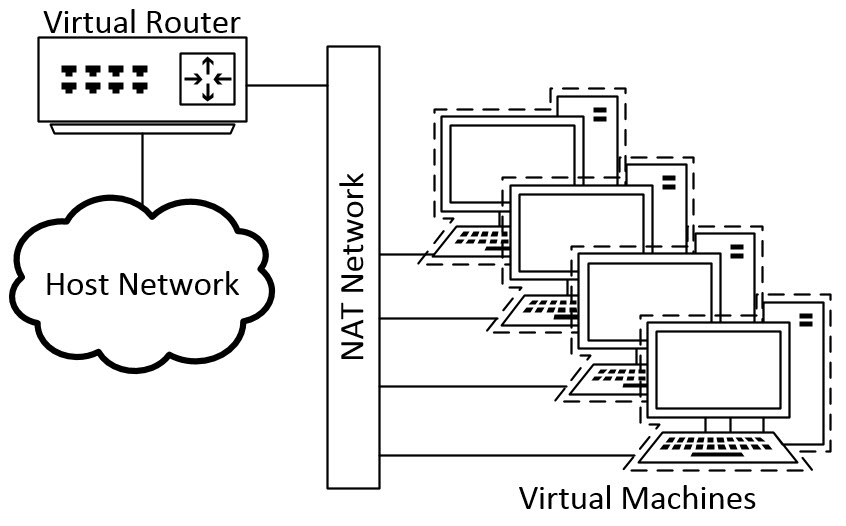
The Network Address Translation (NAT) Network works similar to a home router (in this case it’s a virtual router), it groups the VMs using it into a network and prevents systems outside of this network from directly accessing the VMs inside it, but lets the VMs communicate with each other and with systems outside the network. In the demo we will use a NAT Network to define the external network of our Virtual Penetration Lab. A typical NAT Network layout can look like the following:
We will need to define a NAT Network. For my demo I wanted the external network to have an IP address range of 192.168.10.x. So to create and define the settings on the NAT Network:
- You should already be at the Network options from above
(if not follow steps 1 & 2 in the Host-Only Adapter section) - Select Network and leave it on the NAT Networks tab.
- Click on the green network card symbol with the plus (“+”) on it; a new NAT Network will be created.
- Highlight the new NAT Network
- Click on the “screwdriver” symbol to the right of the network list; the NAT Network Details panel will open.
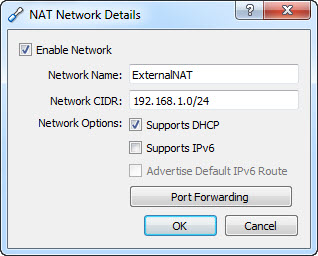
Give the NAT Network a name (I used ExternalNAT) and define the Network CIDR. Click on supports DHCP. This is what my tab in the details panel looked like.
Click OK and then OK again to exit the Preferences panel.
Virtual Penetration Lab Network Layout
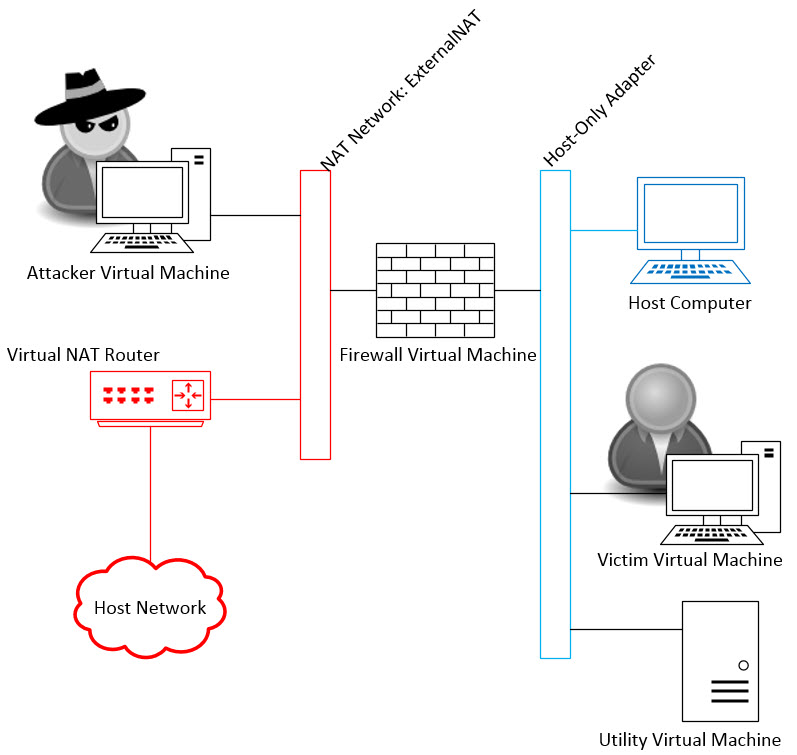
We’ve laid the foundation for our Lab. In the next post we will build our first Virtual Machine: the firewall. We will also join our two networks together using the firewall. This is what the final product will look like. In this post we created the NAT Network in red and the Host-Only Adapter Network in blue.
What do you think of this approach so far? Do you have any thoughts or questions on installing Virtualization Software? Let me know in the comments.