
We are on to building the Victim VM. This VM will be built with Window 7 SP1 32-bit. Be aware that when SP1 was released, these vulnerabilities were either not known or were later zero day discoveries. More on the vulnerabilities in SP1 later during the post on the attacker VM.
Build the VirtualBox VM & Install OS
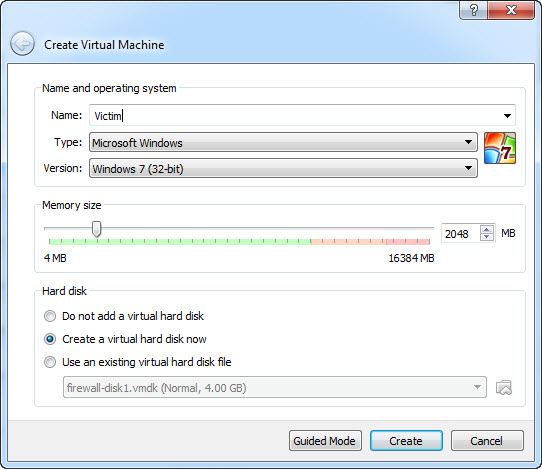
We start off as usual defining the VM in VirtualBox. Click the New VM button in VirtualBox and fill in the name, select the OS Type & Version, and set the VM Memory size to 2048 Mb. Click Create and in the Drive File Size put 25.00 Gb. Taking all other defaults click Create.
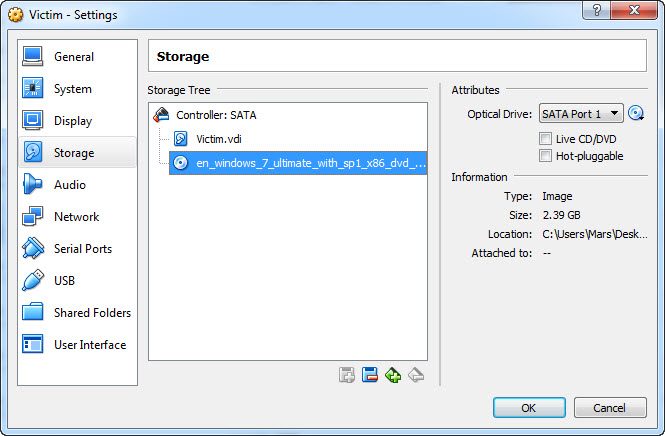
Getting an ISO image of Windows 7 is more complicated than other ISO images we have downloaded, so I’m not going to go into details here. I got mine from a MSDN subscription. Just make sure you get the 32-bit version at Service Pack 1 (SP1). I chose the Windows 7 Ultimate version. Mount the image to your VM’s CD Drive by selecting Settings, Storage then mounting it as we have before; boot your VM and start the installation process.
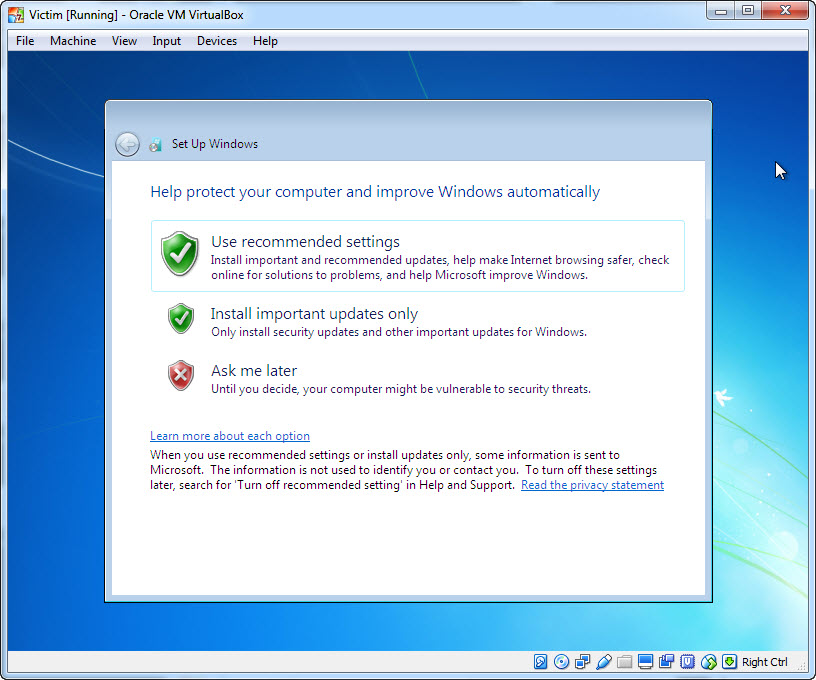
The build process takes all the defaults until you get to the question of updates. Because we don’t want ANY updates to be added to this system, make sure you choose “Ask Me Later”. The install process continues, again take all the defaults, or set values as appropriate to you.
Change Network Settings
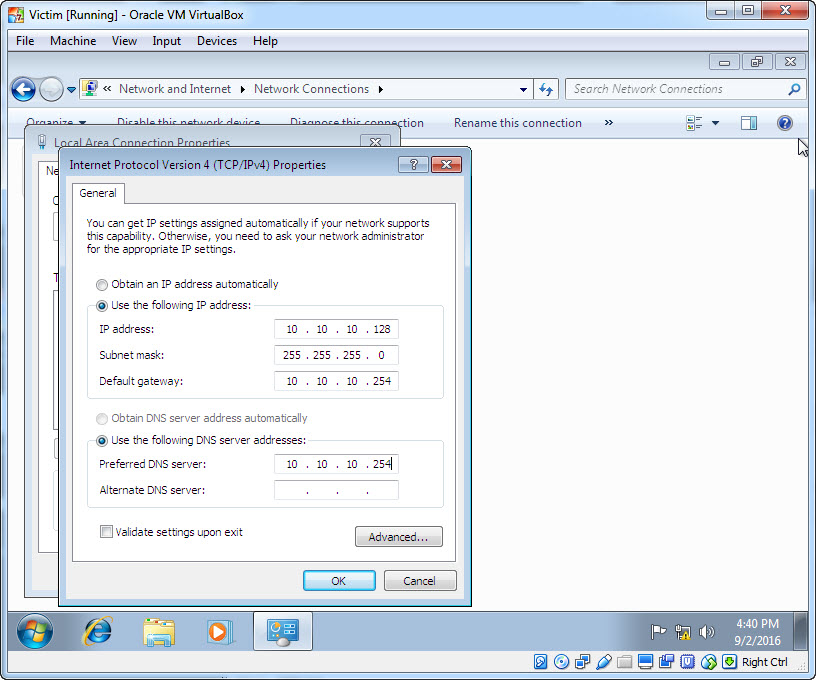
Eventually the install will complete and you will boot into the OS for the first time. We are now going to change the network settings to place the VM into our demo network behind the firewall. Open up the Network Connections by right clicking on the network icon in the systray and selecting “Open Network and Sharing Center”. On the Network and Sharing Center, located on the left panel area, click on “Change Adapter Setting”. You should see one Network Adapter called “Local Area Network”, right click on it and select “Properties”. Highlight “Internet Protocol Version 4” and click on properties. Set the values to static values as appropriate to your network. If you are following my network values, remember from the firewall and network build post we chose an internal network of 10.10.10.x & and external network of 192.168.10.x, and from the Utility VM build post we created a Snort rule to detect traffic between 10.10.10.128 (Victim) to 192.168.10.128 (attacker). So that makes this victim system 10.10.10.128. The subnet mask is 255.255.255.0 and the gateway & DNS server addresses are the internal firewall address of 10.10.10.254.
Staging the Victim VM
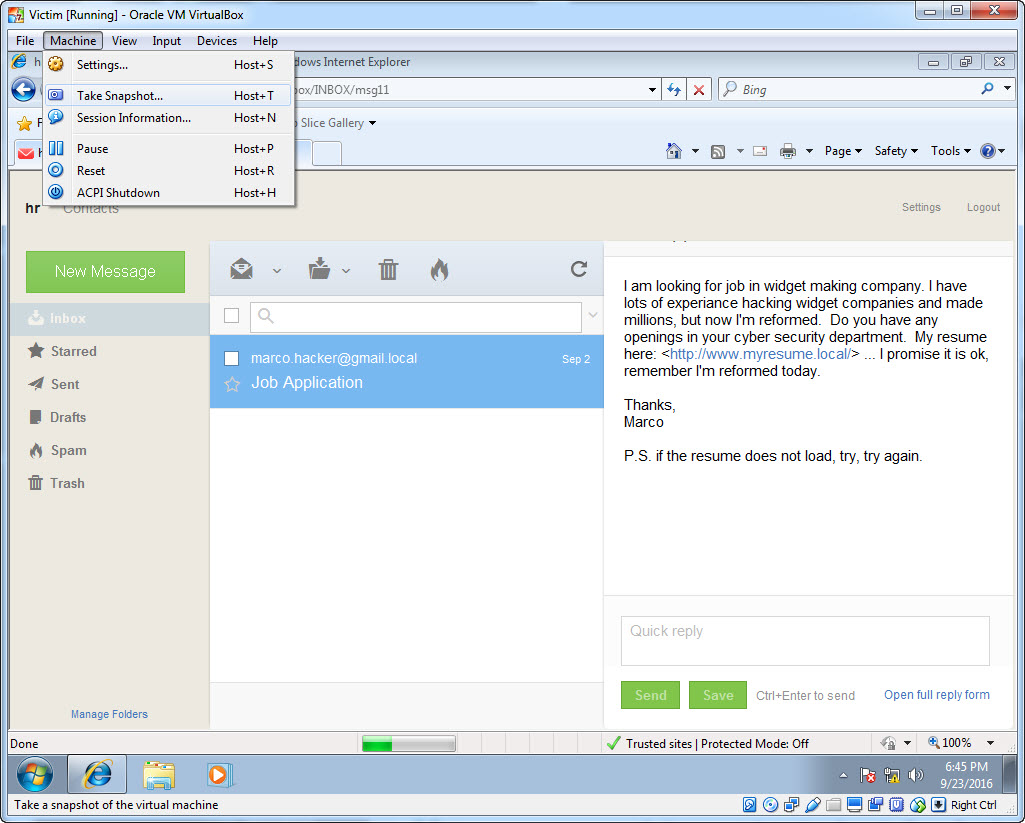
The final part of the Victim setup is staging the device and creating a snapshot. While the VM is running set the display exactly how you want your victim to see it when they first encounter the screen. I had the browser already set to the webmail client and logged in. That way when you reset the environment for the demo, the victim VM always come to the same known starting point.
Next Time
The last system to be built is the attack VM. We will cover not only installing the OS, but creating the attack scripts to exploit our victim VM through the firewall. What exploit delivery vector are we going to use? Well of course: an email phishing vector.
The Victim setup was fairly straightforward, did I miss any points? Do I need to focus on something? Once we finish building the attack VM, I’ll wrap up then entire series with a how to use and run it post. All will become clear soon. In the meanwhile, if you have questions or comments, leave them as a reply.