
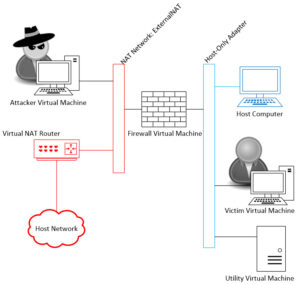
As I continue this series on Selling Your Information Security Team, it’s now time to start building the Virtual Machines that will be used in the demonstration. This post will cover building the keystone of the demonstration … the Firewall Virtual Machine. In Part 2 of this series, we built the host environment and defined the two networks joined by the firewall.
Download Install Image
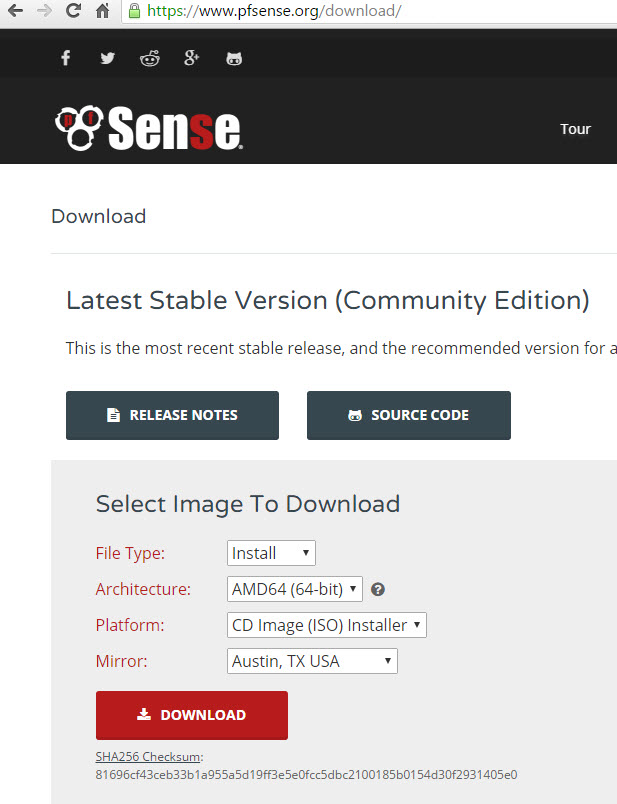
First thing to do is download the CD Image for the latest install of pfSense Firewall. Go to http://www.pfsense.org/download. Select File type: Install, Architecture: AMD64, Platform: CD Image (ISO), and finally select a Mirror site close to you. Click Download and save your ISO file where you can find it later.
Once the file is downloaded, check the SHA256 with the published value on the download page.
Create Firewall VM
Now on to creating a new Virtual Machine within Virtual Box. Open the Oracle VM VirtualBox Manager. At the top is a tool bar, click on New.

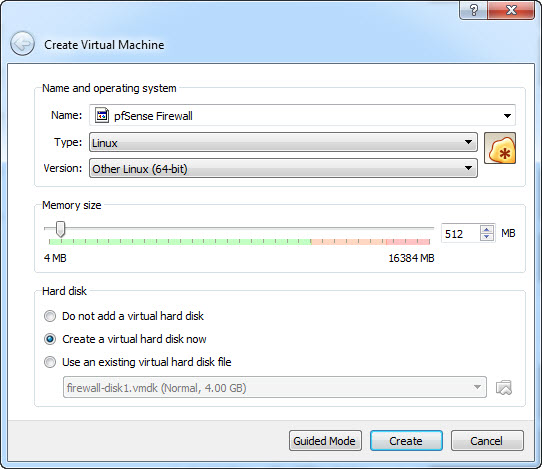
The Create Virtual Machine window will open. Give your firewall a name: I named mine “pfSense Firewall”; for Type select Linux; and for Version select Other Linix (64-bit). Keep the remaining default options and click create.
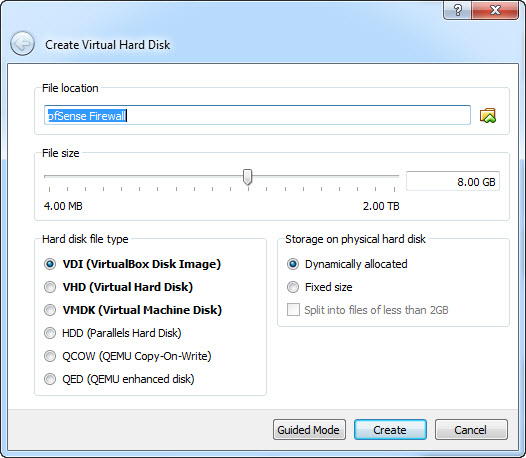
The next windows will be the Create Virtual Hard Disk. Keep all the default options and click create.
There is now a Virtual Machine in your Oracle VM VirtualBox Manager machine list. Select it and click on the Network tab on the right; the pfSense Firewall Settings should open on the Network Panel.
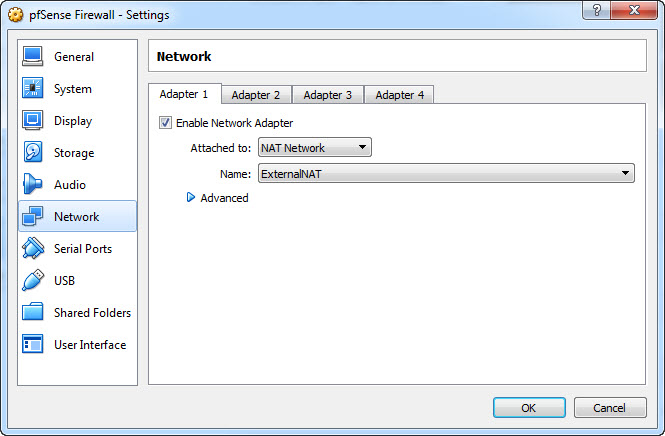
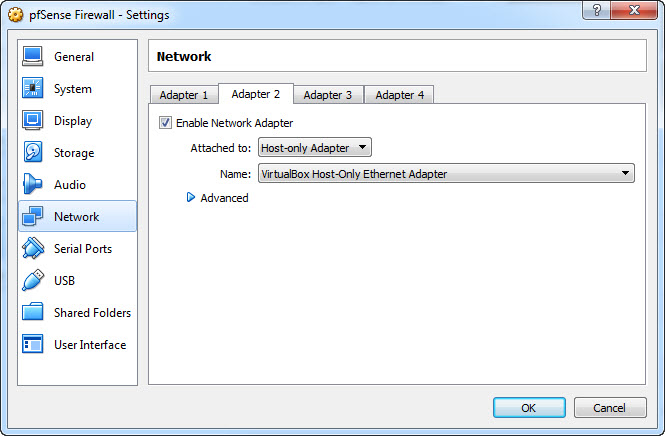
Since this is a firewall, I will be attaching two networks to the VM. We created the two networks in the previous post (Selling your Information Security Team Part 2): a Host-Only Adapter Network (for the Internal Network) and a NAT Network (for the External network). When pfSense starts up it expects to see these two networks already attached and in a specific order. The Adapter 1 will be the External Network, and Adapter 2 will be the Internal Network. Set them as depicted in the next two images.
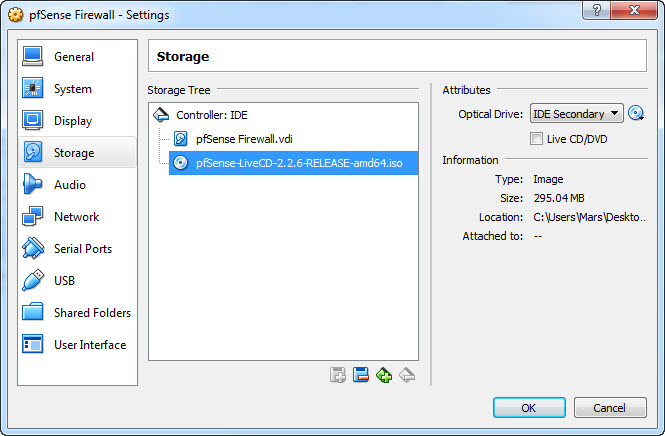
Now the CD Image that was previously download needs to be attached to the firewall CD-Drive. Click on the Storage selection (on the left) and the Storage panel will open. Click on the image of the CD in the Storage Tree panel, and then click on the CD image with the down facing arrow next to the Optical Drive Attribute. Select Choose Virtual Optical Disk File, then find and select the image you downloaded for pfSense. When done your Storage panel should look like this.
Click OK and we are ready to boot our first VM.
Install Firewall OS

Make sure the pfSense Virtual Machine is highlighted on the left VM machine list, click on the green start arrow on the tool bar, your VM will start to boot.
You should see a pfSense splash screen and a countdown timer … let it count down and wait for the Configure Console to start.
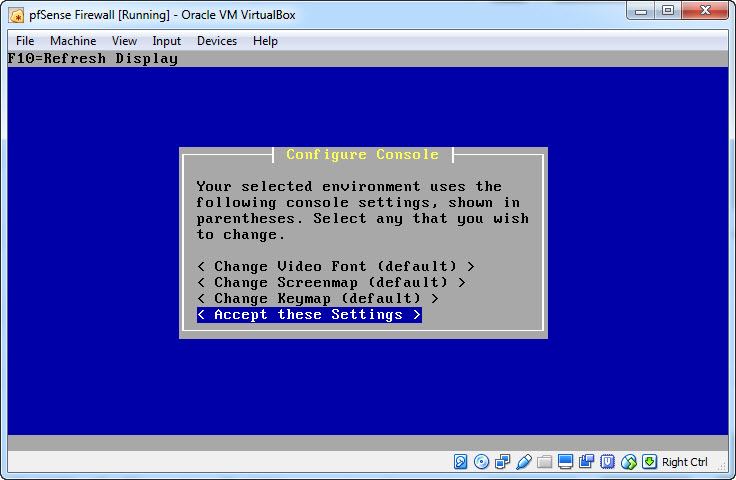
On the Configure Console, use your arrow keys and highlight Accept the Settings and press enter. On the next screen highlight Quick/Easy Install, press enter and then enter on the OK for the Are you Sure warning. The install script will start working and at some point you will be asked if you want to Install a Standard Kernel. Select Standard Kernel and press enter. Finally you will see to the Reboot prompt. Select the Oracle VM VirtualBox Manager, select the Storage on your pfSense VM, hightlight the Virtual CD and click on the CD Image with the down arrow light you did before. Select Remove Disk from Virtual Drive and then press OK for the Network Panel.

Go back to your running VM and select Reboot and press enter … Your VM will reboot and will eventually stop on the options menu.
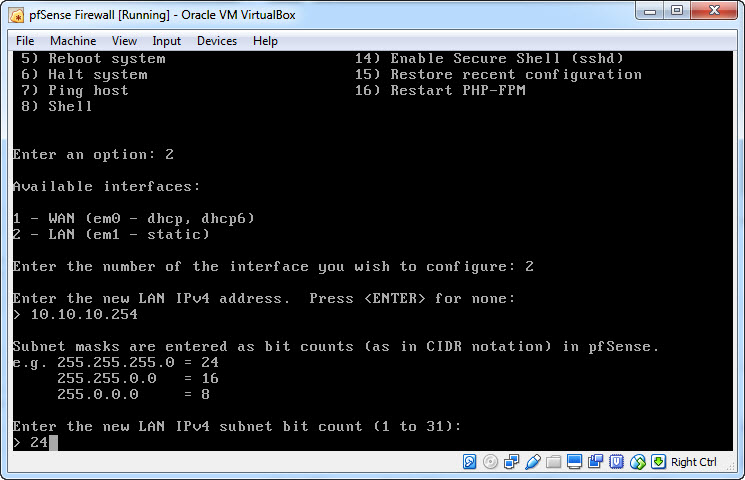
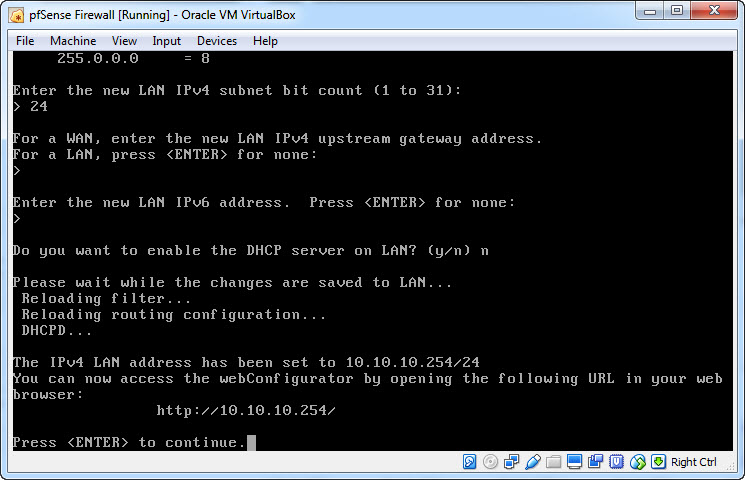
You’ll see the two networks listed at the top with their assigned IP Addresses, but the LAN IP is wrong, so let’s fix that. Enter 2 to select Set Interface(s) IP Addresses, then 2 to select the LAN interface, enter the IP Address 10.10.10.254 (remember our Host-Only Adapter Network uses an address range of 10.10.10.x, so we need to set the LAN side accordingly), press enter, then enter 24 for the Subnet mask, press enter twice (once to bypass the gateway option and then to set no IPv6 address) and then finally enter N for no and press enter when prompted if pfSense should run a DHCP service. Your final screen should look similar to this.
Configure Firewall OS
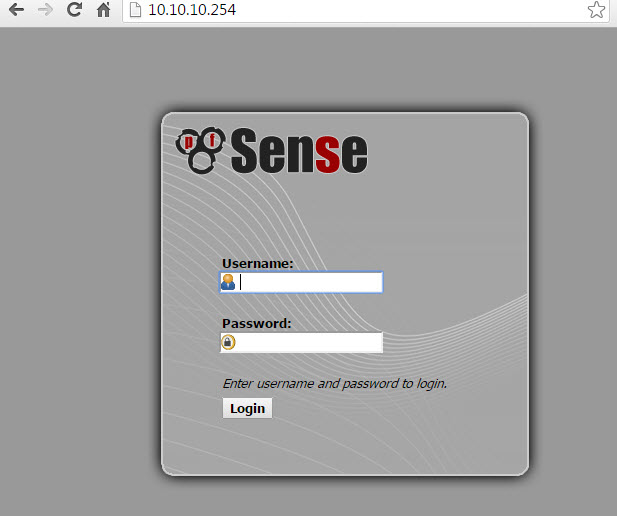
Now we are ready to login to the admin web site. Open a browser on your host computer (not in a VM) and connect to http://10.10.10.254. The pfSense login screen should be displayed, use the default admin user/password: admin/pfsense. The next page will be the Initial Configuration Wizard, click on Next to start the Wizard. On the next screen you will be asked to provide a name and domain for the firewall. I named mine firewall.acme.local (yeah, not very creative am I). Click next after providing the name and domain.
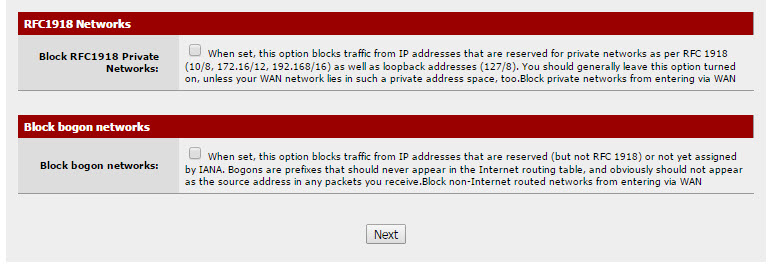
Click next to accept the default NTP service. On the following page, the WAN configurations, scroll all the way to the bottom and uncheck the two settings (Block RFC1918 & Block bogon), then click next.
The LAN configurations should be good so click next. Finally provide a new password for the admin account and click next. The last page in the Wizard asks if it’s ok to reload the configurations, click reload. After the reload, the dashboard will come up.
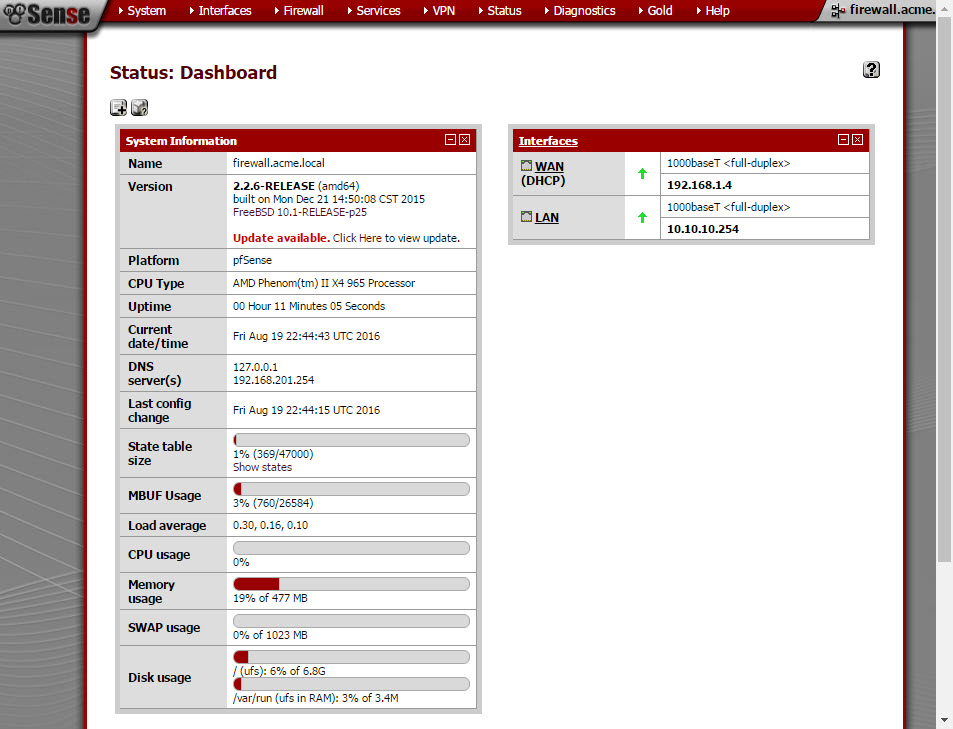
Next Time
In the next installment, I’ll walk you through building the Utility Virtual Machine. This will be used to run the Intrusion Detection System, the Email and Webmail Services, and the cornerstone of the demonstration, the Spunk Search Engine. I’d like to hear your feedback and comments. How is the walk-through?